Reviewed and Updated: July 22, 2026
You sweep, vacuum, and mop, yet the floor still feels sticky, looks cloudy, or leaves dirt on clean socks. The problem may not be a lack of effort. Routine mopping removes recent dust and spills, but it often leaves behind old cleaning-product film, grease, compacted soil, dark grout, and dirt trapped along edges or inside textured flooring. Learning how to deep clean floors correctly helps remove that buildup without damaging the surface. The safest method depends on the floor material, finish, condition, and moisture tolerance, so identifying the surface must come before choosing a cleaner or machine.
What Does Deep Cleaning a Floor Actually Involve?
Deep cleaning a floor means removing loose debris, built-up dirt, grease, cleaner residue, stains, and soil trapped in grout, seams, textures, corners, edges, or carpet fibers. It goes beyond ordinary sweeping and mopping by adding close inspection, stain pretreatment, controlled agitation, residue removal, detailed perimeter work, and proper drying based on the flooring material. A deep clean should improve the floor’s cleanliness and appearance without stripping a finish, forcing water into seams, scratching the surface, or leaving a slippery chemical film. It is a cleaning process, not a repair method. Scratches, worn coatings, lifted planks, cracked grout, permanent etching, or water damage may remain after the dirt has been removed.
Routine Cleaning vs. Deep Floor Cleaning
Routine cleaning controls everyday soil before it becomes difficult to remove. Deep cleaning is used when ordinary methods no longer produce an acceptable result.
| Routine floor cleaning | Deep floor cleaning |
| Removes recent dust, crumbs, and light spills | Removes accumulated grime, residue, and embedded soil |
| Focuses mainly on open floor areas | Includes edges, corners, grout, seams, and hidden areas |
| Uses sweeping, vacuuming, or light mopping | May involve pretreatment, brushing, extraction, or floor equipment |
| Completed frequently | Completed periodically or when the floor condition requires it |
| Maintains an already clean floor | Resets a neglected or heavily used floor |
Deep cleaning does not always require stronger chemicals. In many cases, better dry-soil removal, correct dilution, clean mop pads, controlled agitation, and complete residue removal produce better results than adding more cleaner.
Signs Your Floor Needs Deep Cleaning
A floor may need more than routine mopping if it remains sticky after drying, looks dull under natural light, has dark grout lines, or becomes dirty again soon after cleaning. Greasy kitchen areas, cloudy entryways, dark perimeter lines, visible soil in textured vinyl, and carpet traffic lanes are also common signs.
Other warning signs include:
- Mop water turning dark almost immediately
- Dirt collecting around baseboards and floor transitions
- White or cloudy cleaning residue
- Salt film near entrances
- Odors that return after the floor dries
- Scuff marks that routine mopping does not remove
- Soil remaining beneath movable furniture
- Grout that looks darker than the surrounding tile
Swollen seams, loose tiles, peeling coatings, cracked grout, deep scratches, or exposed wood are different problems. They point to damage, finish wear, or installation issues rather than dirt alone.
Identify the Floor Material and Condition Before Cleaning
The same cleaning method cannot be used safely on every floor. Ceramic tile may tolerate a level of moisture that could swell laminate. A degreaser suitable for commercial vinyl may damage wood or natural stone. Steam that is approved for one waterproof product may void the warranty of another.
Start by identifying the material, finish, and existing condition. Flooring manufacturers often provide specific care instructions, and those instructions should take priority over a general online cleaning recipe. Mohawk, for example, warns against flood mopping wood floors and advises checking whether a product is covered by a steam-mop warranty before using steam. Its laminate guidance also warns against wet mopping, wax, polish, and applying cleaner directly to the floor.
Know Which Floor You Have
Solid hardwood is made from natural wood through the thickness of each board. Engineered hardwood has a real wood surface over a layered core. Laminate normally has a printed design layer over a wood-based core, while luxury vinyl plank and luxury vinyl tile are resilient synthetic products.
Other common materials include:
- Sheet vinyl
- Linoleum
- Ceramic tile
- Porcelain tile
- Marble
- Granite
- Limestone
- Travertine
- Slate
- Concrete
- Epoxy-coated concrete
- Vinyl composition tile
- Carpet
Vinyl and linoleum are often confused, but they are different materials. Natural stone also requires more care than ceramic or porcelain tile. Readers who cannot identify a floor should check installation records, leftover material, purchase receipts, manufacturer markings, property documents, or information from the installer or landlord.
Choose the Right Tools and Cleaning Product
The best tools depend on the flooring, but most jobs begin with effective dry-soil removal and clean microfiber equipment. Avoid starting with a wet mop while loose grit, hair, crumbs, and construction dust are still on the surface.
A practical floor deep-cleaning kit may include:
- Hard-floor vacuum or soft-bristle broom
- Crevice and edge attachments
- Microfiber dust mop
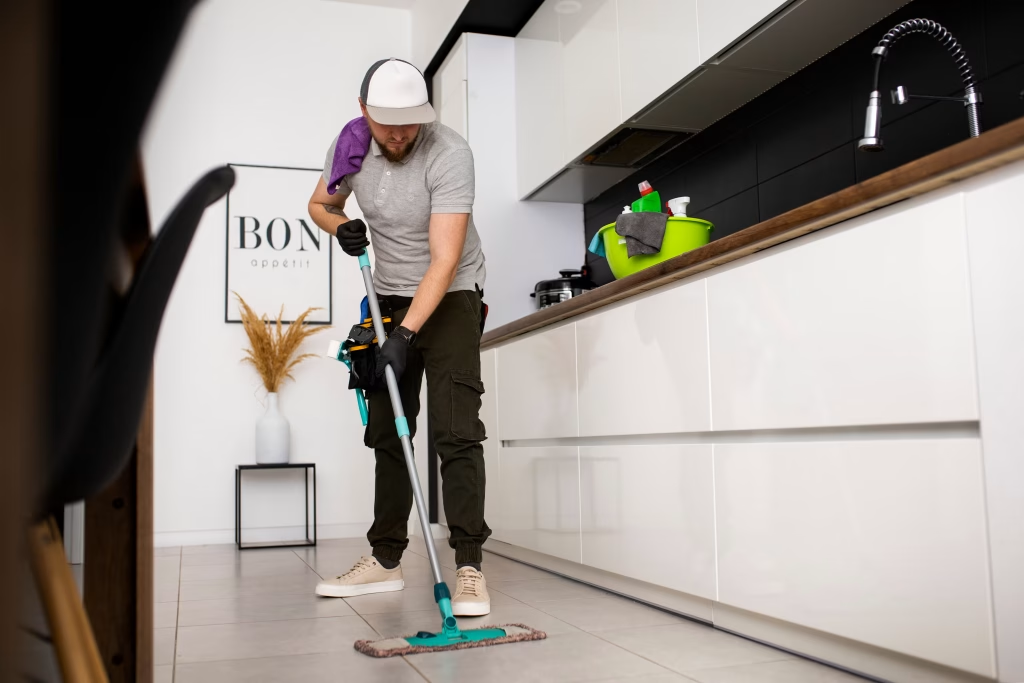
- Microfiber wet mop
- Several clean mop pads
- Separate containers for clean and dirty water
- Soft nylon detail brush
- Grout brush
- White microfiber cloths
- Plastic scraper
- Floor-specific cleaner
- Dry microfiber pads or towels
- Protective gloves where required
- Wet-floor signs for shared spaces
Several clean pads are more useful than one pad used across the whole property. Once a mop pad becomes loaded with dirt and residue, it begins moving soil instead of collecting it.
Match the Cleaner to the Material and Soil
Choose a product based on the floor material, type of buildup, and finish. A neutral floor cleaner may be suitable for general maintenance, while grease may require a compatible degreaser. Natural stone usually needs a stone-safe, pH-neutral product, and carpet spots require a treatment approved for the carpet fiber and backing.
Common product categories include:
- Hardwood-floor cleaner
- Laminate-safe cleaner
- Vinyl-floor cleaner
- Linoleum-safe cleaner
- Neutral tile cleaner
- Grout cleaner
- Natural-stone cleaner
- Enzymatic odor treatment
- Carpet pre-spray or spot cleaner
- Commercial degreaser
- Floor-finish remover
Avoid treating vinegar, bleach, dish soap, baking soda, or steam as universal solutions. The Natural Stone Institute recommends understanding the stone type and using a neutral cleaner or stone soap. It also warns that products containing vinegar, lemon, or other acids can dull or etch calcium-based stones.
How to Deep Clean Floors Step by Step
The general process remains consistent across most flooring: remove dry soil, identify problem areas, use a compatible cleaner, work in controlled sections, remove dirty solution, and dry the surface. The amount of moisture, agitation, and rinsing must then be adjusted for the material.
Step 1: Clear and Prepare the Area
Remove rugs, mats, bins, cords, toys, and lightweight furniture. Protect furniture legs and move items carefully so they do not scratch the floor. In commercial or shared areas, place wet-floor signs and control foot traffic before cleaning begins. Dust shelves, ledges, vents, and baseboards before starting the floor. Otherwise, loose dust may fall onto the newly cleaned surface.
Step 2: Remove All Loose Dirt
Vacuum or sweep the full area before adding water. Pay close attention to corners, baseboards, floor transitions, textured grooves, carpet edges, areas under radiators, and spaces beneath movable furniture. Loose sand and grit can act like an abrasive if dragged across the floor with a mop. In New Jersey properties, entryways may collect road grit, salt, dried slush, and fine outdoor soil during winter, so thorough dry removal is especially important before wet cleaning.
Step 3: Inspect and Pretreat Problem Areas
Identify grease, sticky residue, scuff marks, adhesive, pet accidents, salt deposits, dark grout, food spills, and construction residue. Select a pretreatment that is compatible with both the stain and the floor. Apply it only to the affected area and allow the working time stated on the label. Avoid scraping with metal blades. A plastic scraper or soft nylon brush is safer for many surfaces, but it should still be tested first.
Step 4: Prepare the Cleaning Solution
Measure the product according to its label. Use the recommended water temperature and provide ventilation where required. Keep clean solution separate from recovered dirty water. Do not pour a large quantity of cleaner directly onto the floor. Apply it through the recommended mop, spray, machine, or cloth method so moisture remains controlled.
Step 5: Clean in Small Sections
Begin at the farthest point from the exit and work backward. Divide the floor into manageable sections so the cleaner does not dry before the soil is removed. Use overlapping passes and controlled pressure. Agitate textured areas, grout, or heavy buildup with a surface-safe brush or pad. Replace dirty mop pads and change the cleaning solution once it becomes visibly soiled. Avoid repeatedly dipping a dirty mop into the clean solution. A two-container system or frequent water changes reduce the chance of putting removed dirt back onto the floor.
Step 6: Remove Loosened Soil and Residue
The cleaner must leave the floor with the soil rather than drying on the surface. Depending on the material and product, residue may be removed through clean-water damp mopping, extraction, wet vacuuming, clean microfiber pads, or buffing. Some products are no-rinse, while others require rinsing. Follow the label and flooring instructions. Never flood wood, laminate, engineered hardwood, or surfaces with open seams.
Step 7: Dry the Floor Properly
Remove remaining moisture with dry microfiber pads or clean towels. Improve airflow with fans where suitable and keep people, pets, furniture, and rugs off the floor until it has dried fully. Fast drying reduces streaks, footprints, water marks, and moisture entering seams. It is especially important on wood-based flooring and carpet.
Step 8: Inspect Before Replacing Furniture
View the floor from more than one angle and under good lighting. Check edges, grout lines, seams, corners, residue, damp areas, and remaining stains. If one small area still looks dirty, repeat the safe process there. Do not solve a missed patch by applying a stronger chemical across the entire room.
Household tools can handle light and moderate buildup, but large areas, stained grout, commercial traffic lanes, mixed flooring, and construction residue may require professional equipment. RMS Cleaning provides residential and commercial floor cleaning services across New Jersey and states that its service covers materials including hardwood, tile, vinyl, carpet, VCT, concrete, epoxy, and natural stone.
How to Deep Clean Different Floor Types Safely
The general sequence stays the same, but moisture, product type, and agitation must change with the flooring material. Always check the manufacturer’s current care instructions before using steam, polish, wax, solvent, abrasive pads, or a large amount of water.
Hardwood and Engineered Wood Floors
Vacuum using a hard-floor setting and a soft attachment. Use a cleaner approved for the finish and apply it to a microfiber pad rather than pouring it onto the floor. Work with a lightly damp pad, follow the direction of the boards where practical, and dry the area promptly. Do not use standing water to loosen dirt. Moisture can enter joints or damaged finish and cause swelling, staining, raised grain, or cupping. Mohawk advises against wet mopping wood floors and recommends applying its approved cleaner to the cleaning pad rather than directly onto the surface.
Deep cleaning may remove residue that makes wood look dull, but it cannot restore a finish that has worn away. Bare areas, deep scratches, gray wood, peeling coating, or water damage may require a flooring professional.
Laminate Floors
Vacuum the seams, edges, and textured grain carefully. Use a laminate-approved cleaner with a nearly dry microfiber pad. Spray the product onto the pad or cloth if the manufacturer directs rather than saturating the floor. Treat scuffs gently and dry any liquid near seams immediately. Do not apply wax, polish, oil soap, or shine-enhancing products unless the manufacturer specifically approves them. Mohawk’s laminate care guidance warns against wet mopping, power cleaners, and many steam products, although care requirements can vary by specific product line and warranty.
Vinyl, LVP, LVT, and Linoleum
Remove grit before damp cleaning because hard particles can scratch the wear layer. Use a soft microfiber mop with a nonabrasive product approved for the specific material. A soft nylon brush can help release soil from textured patterns, but excessive scrubbing may dull the finish. Use a fresh damp pad to remove cleaner film where the product instructions allow it. Avoid steel wool, abrasive powders, harsh solvents, and unapproved floor polish.
Linoleum should not be treated as identical to vinyl. It has a different composition and may react differently to highly alkaline products, prolonged moisture, or strong chemicals. Check the product’s care guidance before cleaning.
Ceramic Tile and Grout
Vacuum or sweep first, including along grout lines. Apply a tile-safe cleaner and allow the recommended working time. Agitate grout with a grout brush, then remove the dirty solution rather than spreading it over the next section. Rinse if the product requires it and dry or buff the tile to prevent water spots and cleaner film. Tile can look clean while the grout remains dark because ordinary mopping pushes dirty water into the lower, porous lines.
Deeply discolored grout may not return to its original color if it is stained, damaged, unsealed, or deteriorated. Cracked or missing grout needs repair, while cleaned grout may need resealing depending on the material and previous treatment.
Natural Stone Floors
Identify the stone before choosing a product. Marble, limestone, travertine, slate, and granite do not all react in the same way. Confirm whether the floor is sealed and use a pH-neutral stone cleaner with nonabrasive tools. Remove residue completely and dry the floor promptly. Do not use vinegar, lemon juice, or acidic bathroom cleaner on marble, limestone, travertine, or other acid-sensitive stone. The Natural Stone Institute warns that acidic products can dull or etch calcareous stone and recommends neutral cleaners or stone soap for routine care.
A dull spot caused by etching is surface damage, not dirt. Cleaning will not polish it away. Worn or unsealed stone may need professional polishing, honing, sealing, or restoration.
Concrete, Epoxy, and VCT Floors
Determine whether the concrete is bare, sealed, painted, polished, or coated. Remove dry soil, pretreat grease or rubber marks with a compatible product, and agitate using the correct brush or floor pad. Recover the dirty solution and rinse if required. Unsealed concrete is porous and may absorb stains and moisture. Epoxy can be damaged by harsh solvents or aggressive pads. Vinyl composition tile often carries a floor-finish system and may require scheduled buffing, stripping, or refinishing.
Carpeted Floors
Vacuum carpet slowly in overlapping directions, using edge and crevice tools around walls and furniture. Identify the carpet material and check its care requirements before choosing a spot treatment or extraction product. Pretreat stains without soaking the backing. Use suitable extraction equipment, make several dry extraction passes, improve ventilation, and restrict foot traffic until the carpet dries. Overwetting can extend drying time and may affect backing, adhesive, padding, or the subfloor.
The Carpet and Rug Institute states that vacuuming before deep cleaning is critical. Its consumer guidance commonly recommends professional carpet deep cleaning every 12 to 18 months, while its residential standard says cleaning should follow need and manufacturer requirements, with a minimum interval of every 24 months under that standard.
Deep Cleaning Floors After Heavy or Unusual Messes
Some floor-cleaning jobs require additional preparation because the soil is finer, heavier, greasier, or more deeply absorbed than ordinary household dirt. Construction dust, winter salt, pet accidents, and move-out buildup should each be handled according to the floor material and contaminant.
After Construction or Renovation
Remove screws, nails, packaging, wood pieces, and other debris before vacuuming. Use suitable filtration for fine dust and complete several dry passes before introducing moisture. Wetting drywall or plaster dust too early can create a paste that spreads across the surface and into grout or seams. Identify paint, adhesive, caulk, grout haze, and plaster before attempting removal. A chemical that softens adhesive may damage vinyl or a floor coating. Newly installed floors may also have curing periods or first-clean restrictions.
Our post-construction service covers residential and commercial properties in New Jersey and includes floor care for fine dust, paint spots, glue residue, and other construction-related soil.
After Moving In or Moving Out
Clean floors after furniture and boxes have been removed whenever possible. Vacuum closet floors, edges, former furniture locations, and spaces behind appliances. Check for adhesive, scuffs, pet residue, and soil hidden beneath rugs. Document existing scratches, stains, loose planks, and damaged grout in a rental property before cleaning. Allow the floor to dry before placing boxes, mats, or furniture on it.
RMS Cleaning’s move-in and move-out services include floor care, baseboards, kitchens, bathrooms, appliances, and other high-detail areas for houses, apartments, and rental properties across New Jersey.
Winter Salt, Sand, and Slush
New Jersey entryways can collect sand, salt, road film, and dried slush during colder months. Begin by vacuuming or sweeping all loose particles. Do not drag wet grit across the floor because it may scratch the finish.
Use a compatible cleaner for the remaining film, change pads and water frequently, and dry the entrance promptly. Place effective mats outside and inside doors, but clean beneath them because trapped grit can damage the surface.
Grease and Food Residue
Kitchen and breakroom floors often need a compatible degreaser and controlled agitation. Remove loose food first, apply the product according to its dilution instructions, and recover the greasy solution instead of spreading it. Strong degreasers may damage hardwood, natural stone, linoleum, paint, sealers, or floor finish. Test first and confirm that the product is approved for the material.
Pet Stains and Odors
Blot fresh liquid quickly and check whether it has entered grout, plank seams, carpet backing, padding, or the subfloor. A floor-compatible enzymatic product may help break down organic residue, but fragrance alone will only cover the smell temporarily. Repeated odor may indicate that contamination remains below the visible surface. Carpet padding, unsealed grout, damaged seams, or porous subflooring may need specialist treatment or replacement.
Sewage, Floodwater, Blood, or Hazardous Contamination
Do not treat sewage, major flooding, blood, extensive mold, or chemical contamination as a normal floor-cleaning task. Floodwater may contain sewage, sharp debris, and other hazards. The CDC recommends protective equipment and warns that contaminated properties may require special cleanup procedures. Use a qualified restoration, remediation, or biohazard provider where the contamination exceeds the scope of ordinary residential or commercial cleaning.
How Often Should Floors Be Deep Cleaned?
There is no single deep-cleaning schedule for every property. Frequency depends on material, foot traffic, pets, children, indoor shoe use, cooking activity, weather, floor texture, commercial operating hours, and manufacturer requirements.
| Floor or situation | Deep-clean trigger |
| Hardwood and engineered wood | Visible residue, seasonal buildup, or manufacturer schedule |
| Laminate | Sticky film, textured soil, or edge buildup |
| Vinyl and LVP | Dullness, grease, or heavy traffic |
| Tile and grout | Dark grout, bathroom buildup, or kitchen soil |
| Natural stone | Visible soil and stone-care guidance |
| Carpet | Traffic lanes, stains, odor, or manufacturer schedule |
| Residential entryway | More often during wet or snowy weather |
| Commercial lobby | Based on traffic, soil load, and appearance standards |
| Post-construction property | After work is complete and before occupancy |
| Move-in or move-out property | After rooms have been cleared |
Busy kitchens, entryways, offices, retail stores, restaurants, and shared buildings may need more frequent attention than low-use rooms. A maintenance plan should respond to visible condition and property use instead of forcing the same timetable on every floor. We provide recurring, one-time, deep, floor, and commercial cleaning options across New Jersey, allowing the cleaning frequency to be based on the property and service need.
Should You Deep Clean Floors Yourself or Hire a Professional?
DIY deep cleaning is suitable for many lightly or moderately soiled floors when the material is known, the finish is intact, and the correct tools are available. Professional cleaning becomes more useful when the area is large, the flooring is mixed, the buildup is heavy, or household tools cannot remove the soil safely.
DIY Cleaning Is Usually Suitable When
Cleaning the floor yourself is reasonable when you know the material, can access the manufacturer’s care instructions, have moderate soil, and see no signs of moisture damage or finish failure. The area should be manageable with household tools, and you should have enough time to work in small sections, change pads, remove residue, and allow full drying.
Professional Floor Cleaning Is More Practical When
Professional help may be the better choice when grime remains after correct cleaning, grout is heavily stained, carpet needs extraction, or a commercial area has wide traffic lanes. It is also useful for post-construction residue, several flooring types, large properties, VCT finish care, and natural stone that requires cautious treatment. A professional assessment can also help separate cleanable buildup from permanent staining, worn coating, etching, or repair needs.
What a Professional Floor Cleaning Service Should Include
A credible floor-cleaning provider should assess the material, finish, existing damage, soil type, stains, moisture tolerance, product compatibility, equipment needs, drying requirements, and slip risks before starting. The provider should also explain what cleaning can and cannot achieve. No responsible company should promise that every stain will disappear, a worn finish will look new, or one method will work on every floor.
RMS Cleaning provides residential and commercial floor cleaning across New Jersey. Its listed floor-care capabilities cover hardwood, laminate, tile and grout, vinyl, VCT, carpet, natural stone, concrete, epoxy, and other high-traffic surfaces. Homeowners and facility managers can request a cleaning quote based on the property, floor type, current condition, and service needs.
Deep Clean the Floor According to Its Material and Condition
Effective floor deep cleaning begins with identification, not a bucket of strong cleaner. Determine the material and finish, inspect for damage, remove dry soil, choose a compatible product, control moisture, work in small sections, recover dirty solution, and dry the floor completely. This process removes the buildup that routine mopping often leaves behind while reducing the risk of swelling, scratching, etching, or residue.
DIY cleaning is suitable for many manageable jobs, but large areas, stained grout, carpet extraction, mixed flooring, construction dust, heavy commercial soil, or uncertain finishes may need professional attention. RMS Cleaning provides floor cleaning for homes, apartments, offices, retail spaces, and commercial properties across New Jersey, with service options based on the floor type, condition, and cleaning requirements.